Acoustic Campaign uses database templates to leverage the fastest possible contact upload and email sending in the Fast Campaign Integration with Unica Campaign. A database template is defined in Acoustic Campaign as a database created in Acoustic Campaign that contains no contacts but contains the fields that are used for template personalization, dynamic content rule building, and more. This database must be flexible, keyed databases cannot be used as a database template.
You must have access to the Acoustic Campaign UI to create a database template.
- On the Data tab of the Acoustic Campaign UI, navigate to Databases.
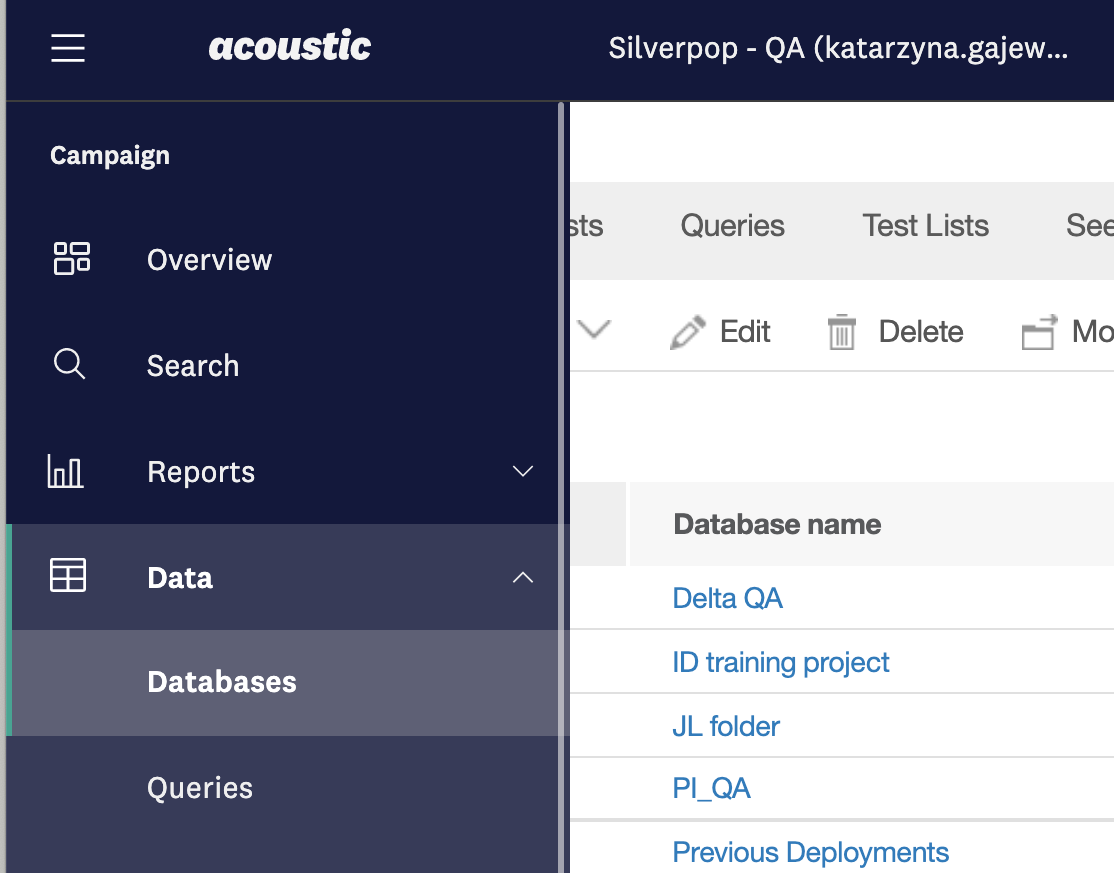
- Click on the Create button.
- Select the Unica Campaign Integration Database Template as the type of database that you would like to create.
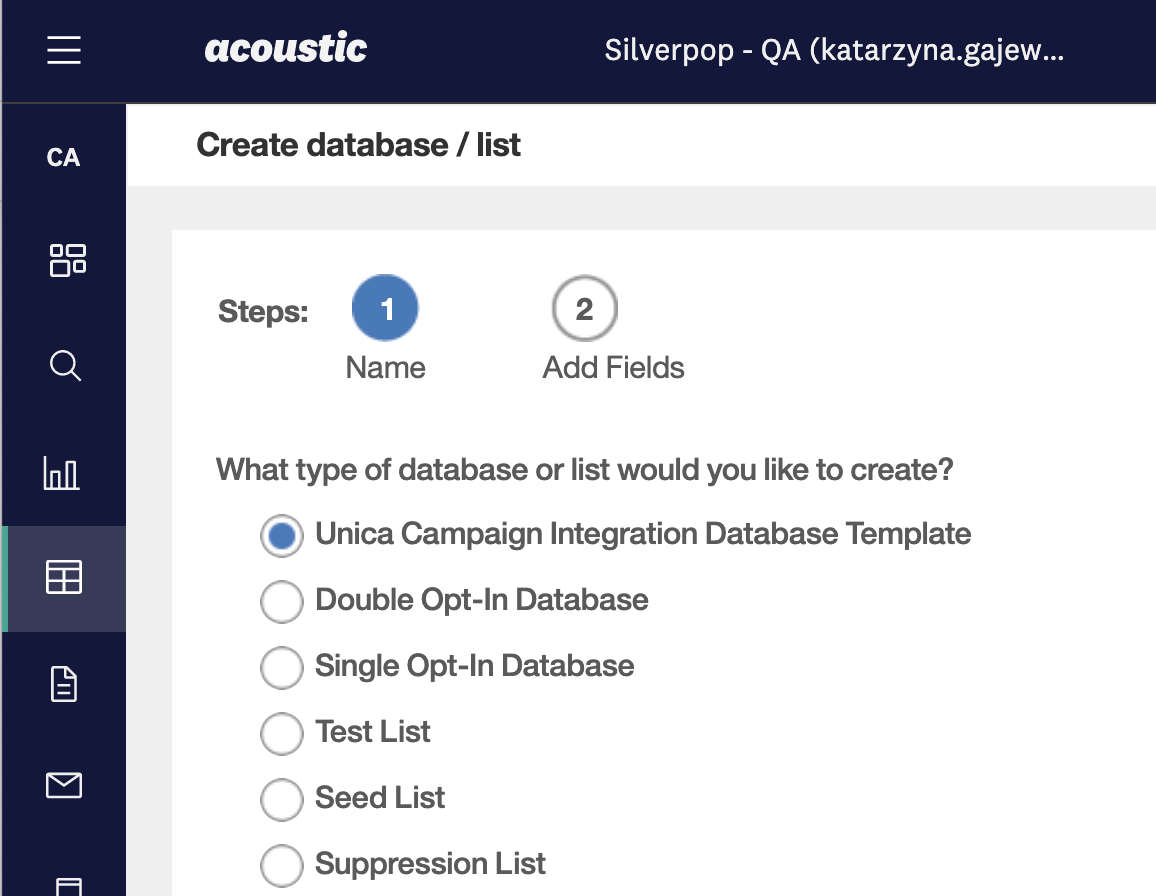
- In the Database or List Name field, designate the name of the database template. A good practice is to prefix the name with the acronym FCI so that it is distinguishable from other databases and so that it can be identified as belonging to the Fast Campaign Integration.
- Under Where would you like your database or list to be saved?, you must select Shared or a folder within Shared.
- Click Next.
- Add a field for any data attribute you wish to use.
- Type a name in the Field Name field.
Field names are required and cannot be changed after the database is saved. If you make a mistake, you must delete the field and create a new one.
- Select a field type from the list.
You can create up to 400 fields in any combination of field types. However, it is recommended that you create no more than 255 field types.
- Click Add Field.
The new field appears in the list of fields. Edit or delete fields by clicking the Edit link next to the new field name. Add as many fields as you need.
- Add a text field called
campaignAudienceId.
- Type a name in the Field Name field.
- Click Save and then Create to continue.
- Designate the
campaignAudienceIdfield as a Lookup Key field.- Go to View Data.
- Select the database you want to use.
- Click Settings.
- Click LookUp Keys.
- In the Status column, check the box next to
campaignAudienceId.After you select Save, the screen refreshes to the Database > Fields tab. A magnifying glass icon displays next to the lookup field.
- Click Save.
Find out how to create a campaign specific to the Fast Campaign Integration.