An image speaks more than 1000 words! So while creating your landing pages, be sure to add some visuals. This way the page will become more appealing to your readers and catch their attention more likely.
You have two ways to add assets, such as files and images, to your landing pages in Campaign.
Insert from the asset library
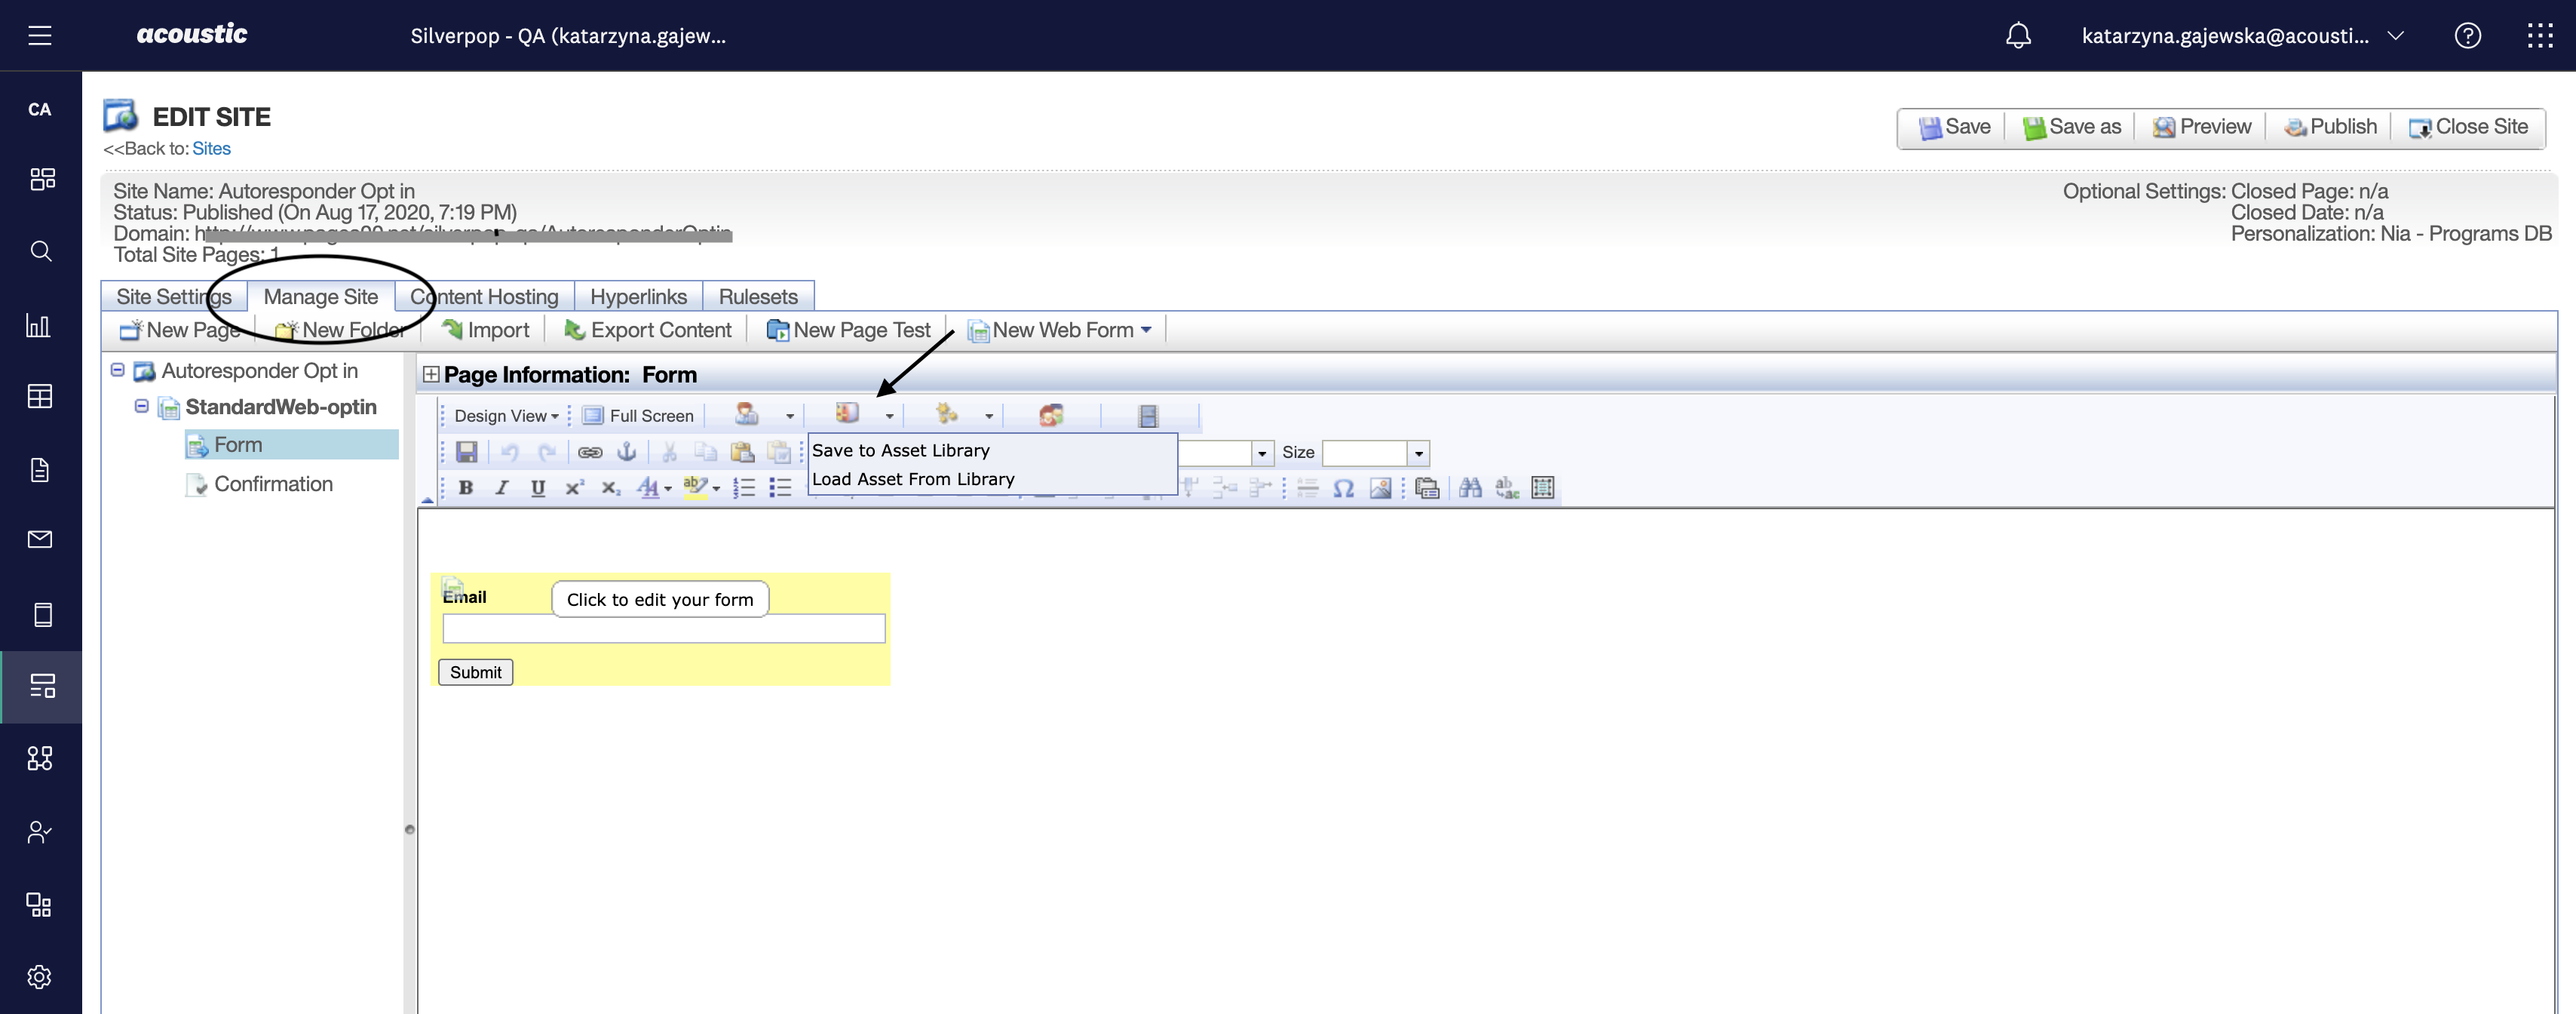
- Go to Landing pages and select the site you want to edit.
- Go to the Manage Site tab.
- Click the Asset Library icon and select Load Asset from Library.

- Right-click the file you dropped on the page to edit the link name (the link name will be the name of the tracked behavior we store in Campaign.)
- Remove the "_number" if it was added to the link name.
Add a file directly from your computer
- Type the file name on your page.
- Highlight the file name and click the Insert/Edit Link icon.
- Select Link to File for the link type and then upload the file from your hard drive (you can also upload from the asset library).
- Type the link name in the Link Name field if it does not auto-populate. Be sure to remove the "_number" if the file has been used before; otherwise, the Campaign will track it as a different download.
- Change the displayed link text.
Note: To track file downloads on your web-tracked site, you'll need to use a JavaScript onclick event. This will track the behavior in Campaign