If you use web tracking on your web pages, you can choose Google Tag Manager (GTM) to implement and manage your web tracking tags.
A tag manager can save you time and make your work easier! Once your development team adds a GTM container to the page code, you can manage and configure scripts from the tag manager interface.
Google Tag Manager is an easy way to push web tracking JavaScript code to your web pages without relying on the developer or your IT department. You can use this asynchronous method instead of the Campaign web tracking implementation. In addition, the web tracking script is dynamically loaded, which makes your page load faster.
Google Tag Manager documentation has everything you need, but we covered the highlights.
Set up Google Tag Manager
Go to tagmanager.google.com and click Create Account.

Name your account. Creating one account per company is a great way to stay organized.
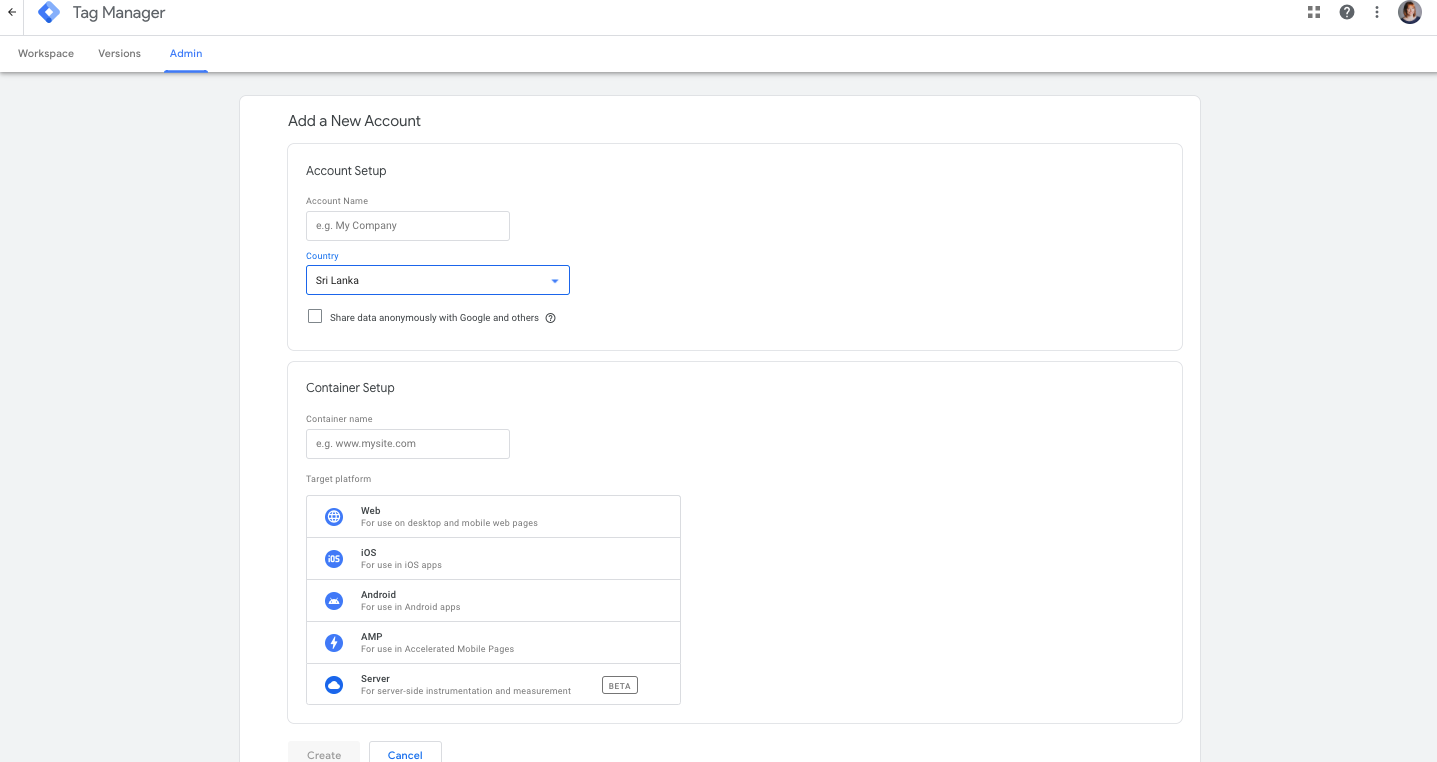
After this is done, you can add a container containing all tags, triggers, and variables. Name the container and choose a platform: web, iOS, Android, or AMP. Click Create. You'll be asked to accept the Data Processing Terms required by GDPR.
Note: You need to publish the Google Tag Manager container each time you make a change, like adding or removing a tag.
Next, you'll see a container snippet that includes code to be pasted into your website's code.
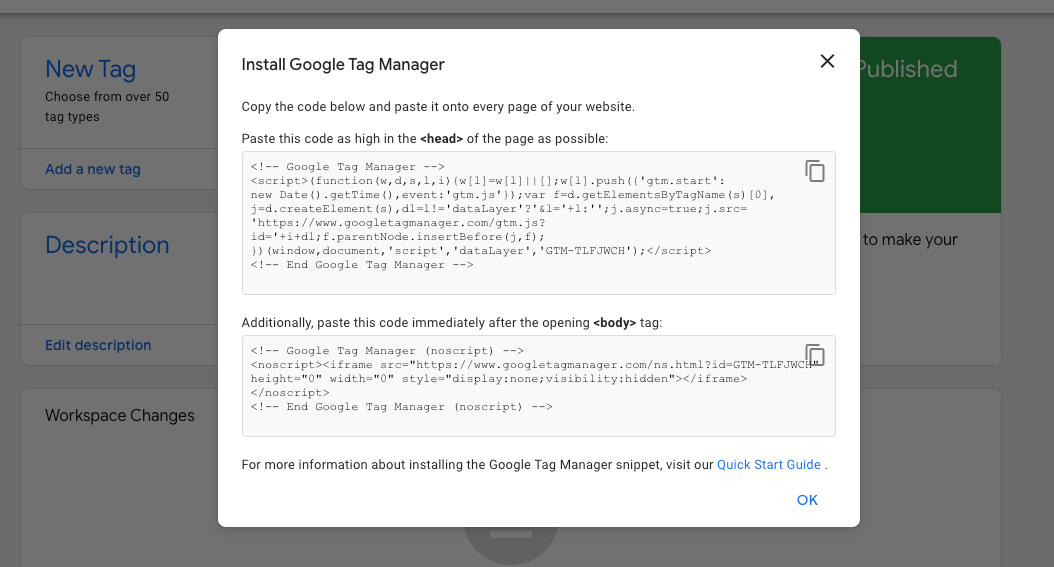
Warning: If you won't install Google Tag Manager into your website's code, the web tracking will not function properly. Learn how to install Google Tag Manager.
Set up custom HTML tags
From the Workspace section, click on the New Tag:
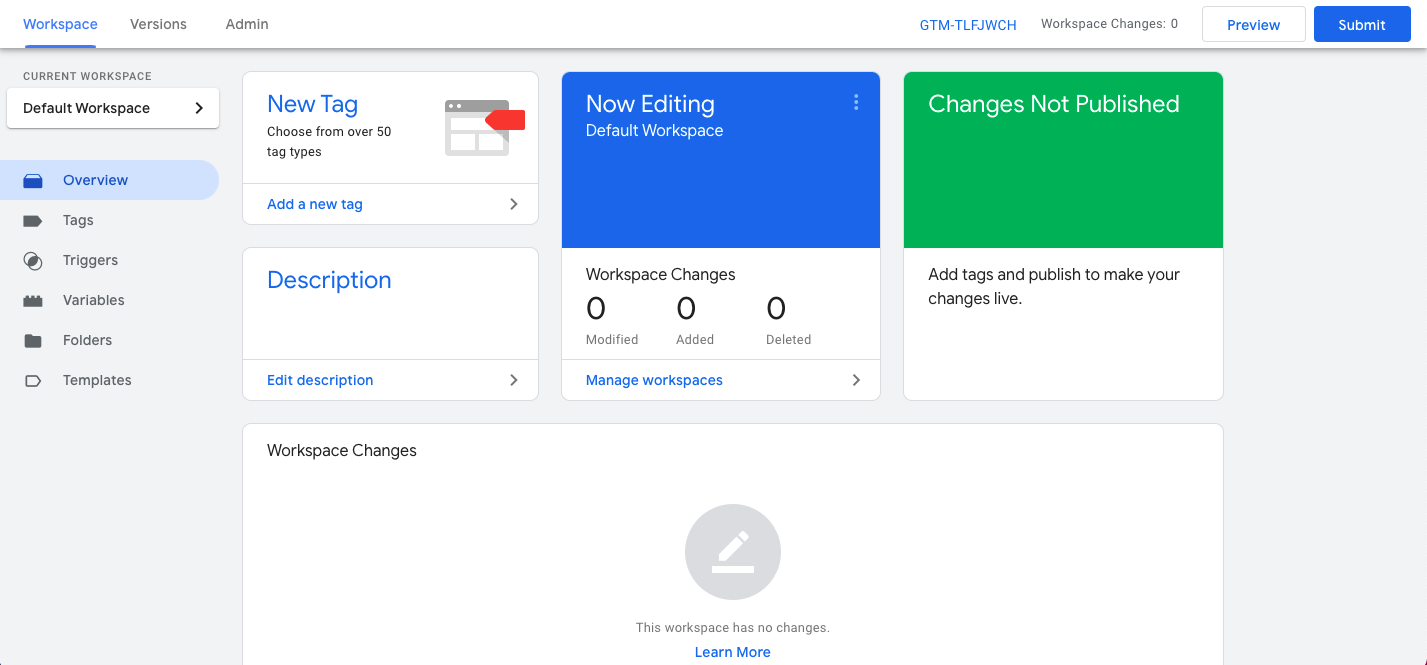
On the Create New Tag page, complete the following fields:
- Enter the Tag Name.
- Click the pencil icon by the Tag Configuration.
- Scroll down and choose Custom HTML.
- Copy and paste the Campaign tracking script shown below in the HTML field.
Campaign tracking script
<script type='text/javascript'> function downloadJSAtOnload1() { var element =
document.createElement('script'); element.src
='';
// This link to be copied and pasted from the web tracking settings within organization settings of
your org// document.body.appendChild(element); var myVar = setInterval(function(){myTimer()}, 10);
function myTimer() { if (typeof ewt != 'undefined') { clearInterval(myVar); ewt.init(); } } } if
(window.addEventListener) { window.addEventListener('load', downloadJSAtOnload1, false); } else if
(window.attachEvent) { window.attachEvent('onload', downloadJSAtOnload1); } else window.onload =
downloadJSAtOnload1; </script>
Tip: Remember that you need to update that script with your cookie URL.
Next, you need to setTrigerring to All Pages (Page View).
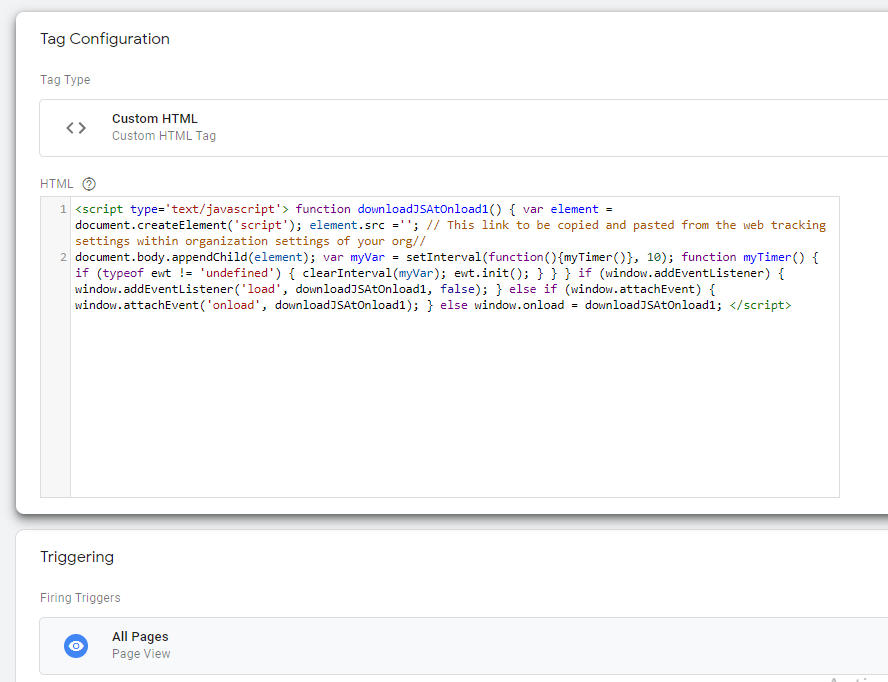
This is important because if you have multiple triggers on one tag, you may count a single pageview multiple times. For example, if you have "All Pages" as the Trigger, Google Analytics should only record one pageview per page load, making your reports accurate.
Install Campaign meta tag Scripts
From the Workspace section, click on the New Tag. On the Create New Tag page, complete the following fields:
- Enter the Tag Name, for example, WebTrackingMetaTags.
- Click the pencil icon by the Tag Configuration.
- Scroll down and choose Custom HTML.
- Copy and paste the Web Tracking Code shown in the HTML field.
- Set Triggering to ALL Pages (Page View).
Note: Web Tracking Code can be copied and pasted from the web tracking settings within your organization settings.
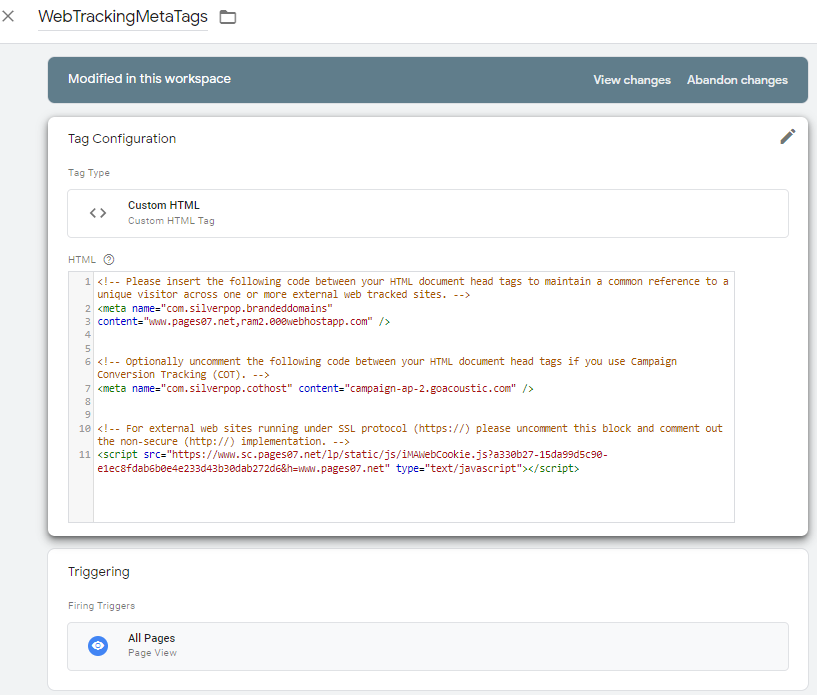
Finally, publish the Google Tag Manager container.
How to validate your changes
Open your Webpage in the browser developer console.
Navigate to Inspect > Application > Storage > Cookie > "your website domain".
You should see a new cookie "com.silverpop.iMAWebCookie" populate within your website.