In Acoustic Personalization, a zone is an area of interest on the channel (for example, a website) on which you can display content personalization or product recommendations.
For example, consider a corporation that sells cutting-edge consumer technology. If the marketing channel owner for this corporation decides to start a new campaign that targets new visitors as potential buyers, then the channel owner can select an area (zone) on the website to display the personalized content. The zone can be in the form of a header or a side bar or in any other form as the channel owner desires.
In the case of Multi-Page Applications, zone is defined using HTML elements, for example, the div element. In the case of Angular Single-Page Applications, zone is defined based on the component used for content rendering or building the UI.
You must configure the zones of your channel by adding the personalization script, so that Acoustic Personalization can interact with your channel to display the personalized content.
For a zone, you can configure either content personalization or product recommendation at a time.
Zone ID
Each zone has a unique identifier, referred to as the zone ID. When registering a zone for personalization, you must provide this zone ID.
In the case of Multi-Page Applications, the zone ID is specified by the website developer while creating the HTML source code for the web page.
In the case of Angular Single-Page Applications, the channel developer must identify the components where personalization is to be applied and subscribe those components for personalization by passing a unique ID that is same as the Zone ID specified in Acoustic Personalization.
When registering a zone for personalization, you must provide this Zone ID.
The combination of zone name and the Zone ID must be unique within the channel being personalized.
The valid characters for a Zone ID are A-Z, a-z, 0-9, hyphen (-), and underscore (_).
Zone ID should not contain a space, or special characters, except hyphen (-) and underscore (_) characters.
To view a zone ID in a website, complete the following steps:
- Open the website that you want to personalize in a web browser, for example Google Chrome.
- On the website, decide the section (zone) that you want to personalize. For example, header banner.
- Right-click on the selected zone and click Inspect from the context menu in Google Chrome. If you are using Mozilla Firefox or Microsoft Internet Explorer / Edge browsers, click Inspect Element.
The div element associated with the zone is highlighted. - Note the unique ID for the HTML element. For example, div id = “WelcomeBanner”
This is the zone ID that you need to specify during zone registration.
If the website that you want to personalize does not have unique identifiers for the section, then it is recommended to assign a unique zone ID to each HTML element that needs to be personalized.
Register a zone
You must register the zone to personalize using Acoustic Personalization. When you access Acoustic Personalization for the first time, the Zones page directs you to Register a channel page. You need to first register a channel and then return to Zones page for registering the zone under the channel.
To register a new zone:
- Log in to Acoustic Cloud.
- Go to Personalization > Settings > Implementation Status.
- In the Implementation Status page, click Channels tab. The channels that are registered for personalization within your organization are displayed on the page.
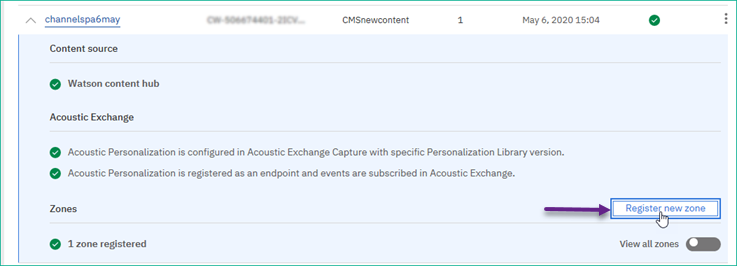
- In the Channels tab, click the twistie icon next to the channel name for which you want to register the zone.
- Click Register new zone.
- Provide the required details. Enter a name for the zone. Enter the zone ID to be registered. Enter a short description for the zone.
- The combination of zone name and the Zone ID must be unique within the channel being personalized.
- Zone name should not have these characters: ~ ` ! @ # $ % ^ & * ( ) + = < > , . \ / | { } [ ]
- The valid characters for a Zone ID are A-Z, a-z, 0-9, hyphen (-), and underscore (_).
- Zone ID should not contain a space, or special characters, except hyphen (-) and underscore (_) characters.
- Click Register.
The new zone is registered, and its information is displayed in the Zone registration section.
Edit zone details
To edit a zone:
- Go to Personalization > Settings > Implementation Status.
- In the Implementation Status page, click Channels tab. The channels that are registered for personalization within your organization are displayed on the page.
- In the Channels tab, click the twistie icon next to the channel name.
- In the Zones section, move the slider to view the zone information.
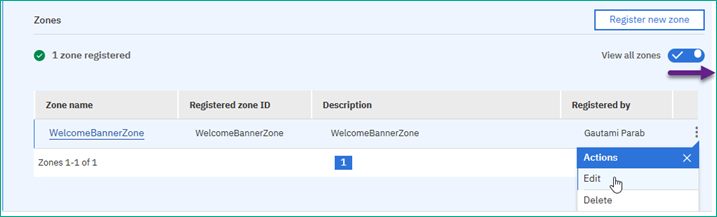
- Open the Actions menu for the zone and click Edit.
- Modify the zone details, and then save it.
Delete a zone
Note
You cannot delete a zone that has one or more draft, published, or archived rules associated with it.
To delete a zone:
- Log in to Acoustic Personalization.
- Using the menu, go to Personalization > Settings > Implementation Status.
- In the Implementation Status page, click Channels tab. The channels that are registered for personalization within your organization are displayed on the page.
- In the Channels tab, click the twistie icon next to the channel name.
- In the Zones section, move the slider to view the zone information.
- Open the Actions menu for the zone and click Delete.
- A confirmation pop-up window opens. To delete the zone, click Yes.
View your zones
The Zones dashboard displays a summary of your zones. Use the Zones dashboard to access your content personalization rules, product recommendations strategy, or email recommendations.
To access the Zones dashboard, complete the following these steps:
- Log in to Acoustic Cloud.
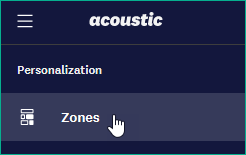
- In the menu, go to Personalization and click Zones.
If there are no channels registered in Acoustic Personalization, the Zones page redirects you to the Channel registration (Register a channel) page.
Zones dashboard displays a summary view of the zones and personalization information for the channels that belong to your organization.
When you visit the page for the first time, all the zones registered for all the channels in your organization are displayed. To view the zones for a specific channel, from the Channel list, select the channel. To view the zone details, click the zone name to view all the rules in the zone.

You can also search for a specific Zone name by using the Search box. To return to the previous view, click X.
You can specify the number of zones to be displayed per page. By default, 25 zones are displayed on a page.
The dashboard provides following information for each zone.
|
Field |
Description |
|
Name |
Name of the zone as registered in Personalization. Click the name to view more details about the zone. |
|
Personalization |
Number of active personalization rules and the total number of rules configured for the zone |
|
Impressions |
The number of times any of the published rules for the zone matched the visitor behavior and personalized content was displayed on the zone. It is calculated from the time the first rule was published for that zone. This metric applies both to the currently published rules as well as currently inactive rules. |
|
Last published |
The latest date on which the personalization rule was published on the zone |
You can view the zones in two ways: Table view and card view.
Table view
This is the default view. You can also select it by clicking  . Choose this view if you have a large number of zones and want to quickly navigate across them.

Card view
You can select this view by clicking  . Each card displays details such as the channel URL, zone name, total number of rules, number of times the personalization been applied, and the last published date.
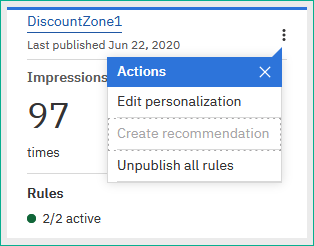
Choose this view if you have a limited number of zones and prefer to have details of each zone visible at a glance.
Unpublish all rules
To unpublish all rules by using Actions menu, complete the following steps:
- Go to the zone for which you want to unpublish the rules.
- Click Actions > Unpublish all rules
- Click Unpublish.
- All rules are now inactive for the zone.
If you do not want to unpublish all rules on that zone, click Cancel.